Creative people have a way of inspiring each other. When they get together and start sharing ideas, techniques and observations, “stuff happens.”
We are fully well aware of the fact that taxidermy appeals to all walks of life, young and old, male and female. Along with that we have a wide range of skill and experience among those who practice the art.
The “How To” we present is not a “Have To.” We are trying to bring to our visitors an array of techniques from which they can pick and choose what would best accommodate their individual work style.
There will be other visitors to this Website that will view these examples and say to themselves, “I can do better than that,” or “I can improve upon that.”
An accomplished airbrush artist may well look at this section on “live ear” technique and think, “I can do those effects really well in a fraction of the time with my airbrush.” That person would be right.
We are also well aware of the fact that there will be those viewing these articles and thinking, “Those guys are crazy. That’s too much work.” Or, “That’s too hard.” We’re going to provide information for those viewers too!
A beginning taxidermist that is “fighting” just trying to get results may well find the answer to what is causing his problem that is interfering with his success by reading these articles.
Improving quality of one’s work and cutting down on the amount of time it takes just seems to be an almost necessary evil of the growth process.
It seems that a person always becomes faster once they become good.
The whitetail taxidermist is a recycler at heart. The food wrapper the venison comes in gets turned into an artistic wall hanging. Plastic milk jugs have a number of uses. The worn out toothbrush grooms hair on ears and faces. The favorite old flannel shirt eventually gets turned into a cleaning rag. The skins and capes get “sweated” in old cotton.
We may not save the first landfill with this technique but at least we will be keeping with the theme. We will recycle aluminum beverage containers and call them:
POP ART EARS
A commercial plastic ear liner is needed (Option: Make your own ear liner) for the Live-Ear Technique. The Ears Back Natra-Look comes consistently closest to fitting the ears of the deer from the area of the WTDS product developer. Many of you will be fortunate enough to have deer ears that will fit to the Eppley buttless liner.
Between the Natra-Look or Eppley Ears Forward or Alert Liners there are enough size choices available you should find something that will basically fit. The finishing techniques will work with any of these liners.
Buttless liners give the taxidermist choice of ear position and shape of butt muscles.
The Pop Art Ears are made for pre-sculpted butts.
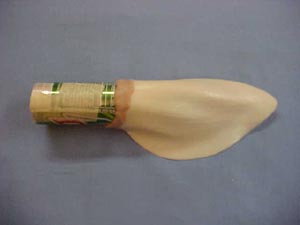
Cut the existing butt off the Natra-Look Ears Back liner at the mold line (visible inside the ear).
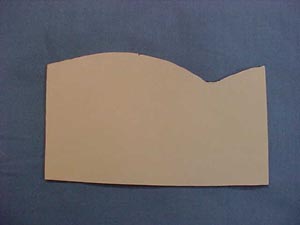
Curl up a piece of paper and place it inside the ear hole. Use a fine point felt marker and mark the outline. Cut the paper to fit the end of the trimmed ear. Transfer the paper pattern to a piece of poster board. This will serve as your template.
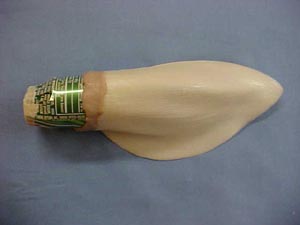
A sharp utility knife will bevel the cut edge of the liner. Top ear has not been beveled, bottom has.
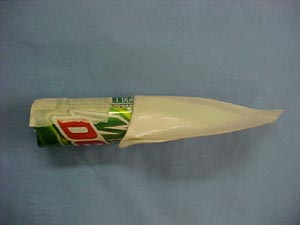
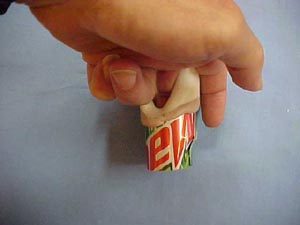
Cut the top and bottom off a pop can and split the cylinder lengthways. You now have a new art material!
Transfer the template pattern to the pop can material. The thin aluminum cuts really well with scissors.
"Split the difference” at the surface area of the plastic. Hold aluminum to shape with masking tape.
Roll out a piece of two-part sculpting epoxy and stick to ear liner. Blend in to the ear liner. Allow to harden.
Stick your finger in the ear to identify the auditory canal.
Cut fringe-like strips in the aluminum to get the length of ear you need. Fold the fringe in and hold in place with tape. Use body filler to cover the aluminum. Carve the body filler once it firms up.
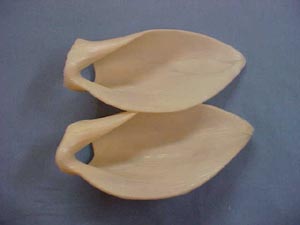
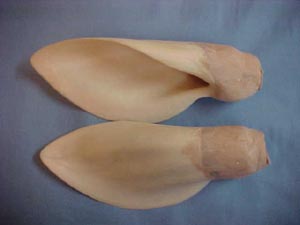
The finished shapes will look something like this. Files and sanding papers (garnet or emery cloth) help smooth and blend.
Blend in the inside of the ear with sculpting epoxy. Keep the wall below the “V” of the ear opening thin.
For the fast paint technique just brush on a coat of Hydro-Mist Natural Flesh.
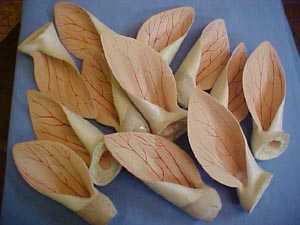
Use Hydro-Mist Gill Red to paint on the blood veins. Use a liner brush. The veins are about the same diameter as a #2 finishing nail. The vein pattern shown here is not accurate. It can be painted on fairly quickly. Part of it will be covered with the hair tracks. If you are turning up your nose at the lack of accuracy of the vein pattern, then it should be pointed out that this is the very pair of ears that tricked you a few pages back!
Preparing several pairs at once cuts down on “time per ear.”
After the Gill Red has dried, brush on a coat of Polytranspar Fin Cream and allow to dry.
Then apply another very thin coat of the Natural Flesh. This combination tones down the red and produces depth of finish. This ear liner is ready to use.
To Order: Telephone Toll Free in U.S.A. 1-866-849-9198
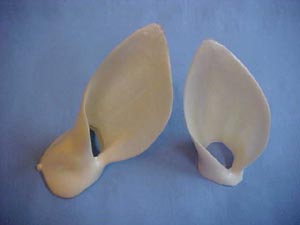
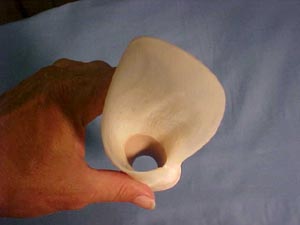
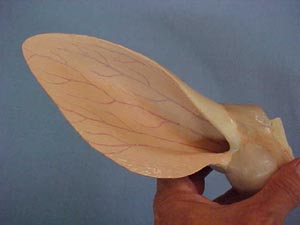
The ears you see here are as thin as they appear in the photo. The finished ear thickness runs from .063 to .067 of an inch thick, that's hair, skin, glue, and earliner, the whole ball of wax.
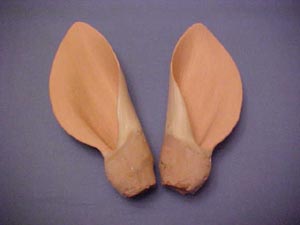
The ear butts were made on an earliner as demonstrated above. The ear butts were cut off, and inner ear detail was sculpted by hand from Apoxy Sculpt.
The actual earliners were made from cotton sheet impregnated with Tite Bond II Waterproof Wood Glue. The actual cartilage was used for the pattern. The sheet produced can be cut with scissors, and shaped by warming with a hair dryer. If the sheet sticks to and burns your fingers, you got it too hot.
The cloth earliner was glued around the Apoxy Sculpt ear butt.
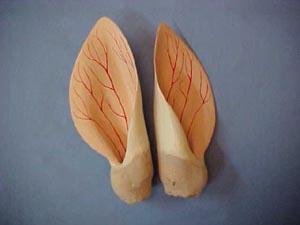
Blood veins were created on the backside of the ears by gluing strings of varying diameters to the liner in their proper places.
The cloth earliner was painted with artist's oils thinned with turpentine. They were painted in the same manner as if they were flat work pieces.
Polytranspar Fin Creme was used for the ear skin adhesive.
Alter deer earliners and create Pop Art Ears!
Antimated created from Buck Biting Apple Reference photos stk.# pr 6