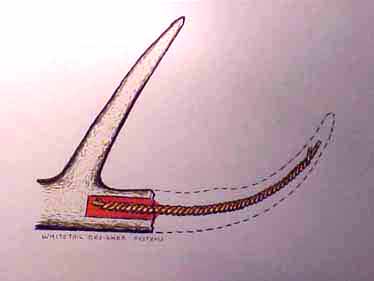
For this repair, drill an over-sized hole into the antler. Fill the hole with body filler. As soon as the hole is filled, insert twisted 12 gauge copper wire. Hold in place until body filler “kicks” or becomes firm.
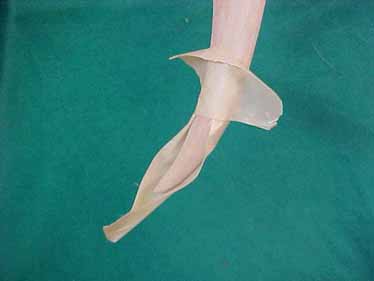
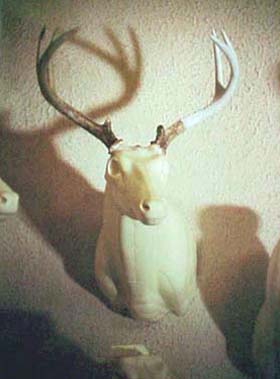
This repair was made, but when placed on the mannikin, the antlers appeared off balance. The main beam needed to be lengthened. Using Painter’s Grade Masking Tape, form a trough approximating the desired length and shape.
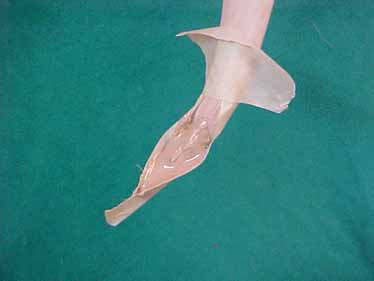
Fill the trough with body filler. Allow to “kick”, and then pull off tape.
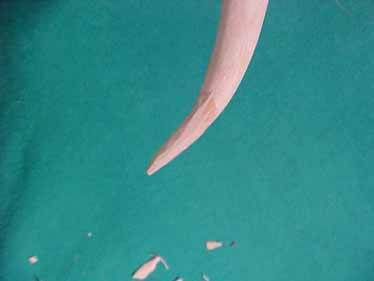
Whittle the filler to basic shape while it is firm, but not hard. To avoid breaking off the tip, carve back toward the antlers, allow this to harden, sand with garnet paper or emery cloth. Fill in any low spots and sand smooth.
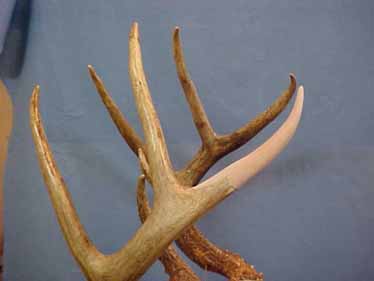
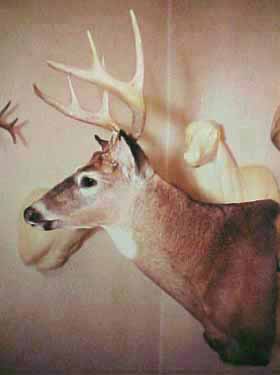
You are now looking at the repair. Be careful in making antler repairs that you do not get the repaired area “too perfect”. That is easy to do. Pick up at least part of the shape irregularities that would be consistent with the rest of the antlers.
Painted tip has been done with artist’s oils.
Antler color shades and tints vary greatly. Get your eyeballs and mind in focus and ask yourself, “What colors do I see where?”
In this case it was burnt umber, yellow ochre light and Payne’s gray “milked out” with titanium white and chrome yellow medium hue mixed together. Chill out. It’s not as hard as it sounds.
Mix a teeny bit of chrome yellow medium hue with titanium white just to the point of being slightly yellowish white. Paint this onto the bare body filler after thinning down with mineral spirits to the point that it just covers the filler without the filler showing through.
After doing that, add just enough yellow ochre light to the mix to produce a horn color. Now eyeball out the tips on the rest of the antlers and decide where to apply the horn color. Use a dry brush technique; just tip the brush (flat stiff bristle) with color. Apply in desired areas with “blotchy” strokes. Clean the brush every two or three strokes.
Add a tiny, tiny bit of Payne’s gray to the mix and repeat the above procedure.
Use a drop of burnt umber, and smear it out thinly on your palette. Use the same flat hard bristled brush and barely tip it with umber. Jab the very tip of the brush on to the painted surface in a pattern consistent with the brown you see on the other tines. Clean the brush every two or three jabs. Once the umber is in place, use a soft, flat hair bristle brush and lightly stroke the painted area to blend and smooth the paint. Keep the brush clean. Stroke one side, turn over and clean. This will help keep from turning the colors “muddy”.
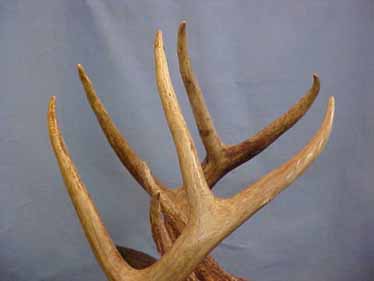
Front view of the repaired main beam. BIG HINT. The chrome yellow medium hue is a transparent oil paint. The use of this yellow in the mix up-front helps avoid the painted look.
I have never had any problems with adhesion when Apoxie Sculpt has been applied over a body filler. Using the same techniques as described above, and then using Apoxie Sculpt to create beading or any other shapes needed, a person can pull off some rather extensive repairs.
To Order : Telephone Toll Free in U.S.A. 1-866-849-9198 or 1-877-861-5679
WHITETAIL DESIGNER SYSTEMS, INC.
Tanning Supplies and Taxidermy Reference Photos
Animateds were created with wild turkey photos from Eastern Wild Turkey Head Studies (22), General Reference Assortment (23), Feather Pattern Arrangement (24)