

Open and Turn Whitetail Deer Ears for a Taxidermy Mount
by Glen Conley
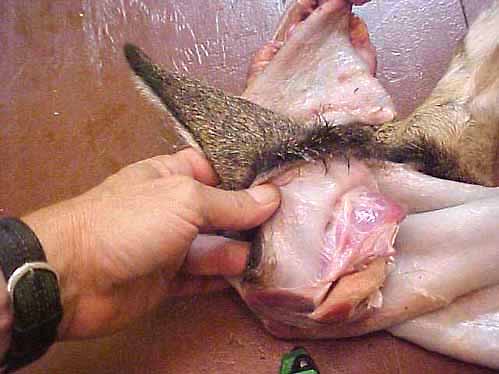
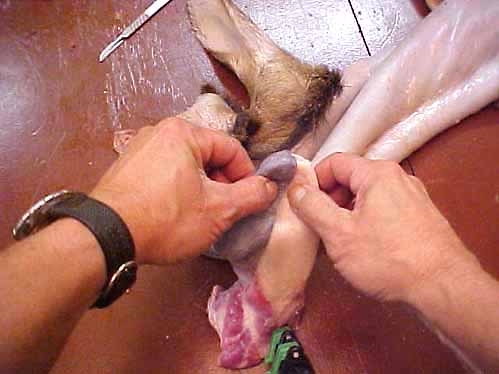
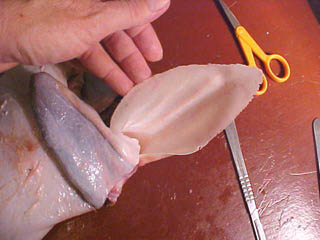
The cape has been skinned out and the ears have been cut off right next to the skull. This leaves all the ear butt muscles attached to the cartilage of the ear. It's pretty easy to see and tell the difference between the muscle and skin. You want to take your scapel and start cutting the muscle away from the skin.
Keep your cuts close to the skin and the skin will come off pretty darn clean. Keep slicing and peeling like a banana until you are over the cartilage.
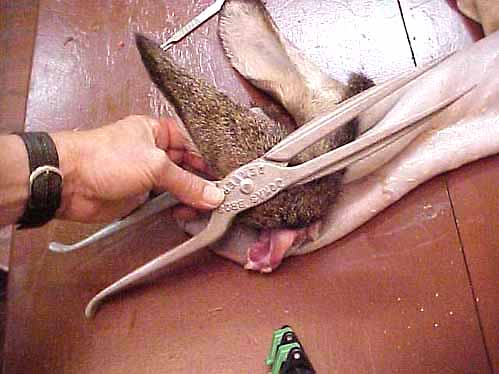
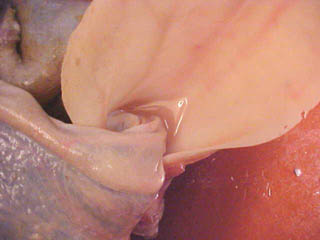
Once you are over the cartilage, there's a couple of options to finish opening the ears. One, you can continue in the same manner as you have been doing, using your fingertips wherever you can to separate the skin from the cartilage, or............
you can go with option number two, and buy a set of ear openers/pliers. These are a reverse action plier that work like the farrier's horse shoe heel opening pliers.
The ear pliers can generate quite a bit of force, so be careful or you'll be making ear flaps. Keeping a finger and thumb just in front of the tips will help to give the feel as to how much you are spreading the skin and cartilage apart.
This cape was STOP-ROT treated up front and that does make for easier separation of skin and cartilage.
Conditions that can cause you problems are age of the deer (ears on old bucks can be pretty tough), fly and tick bites, freezer burn, air dried ears, and physical damage such as rips, tears, and holes. I'll cover dealing with these once we finish with this basic primer.
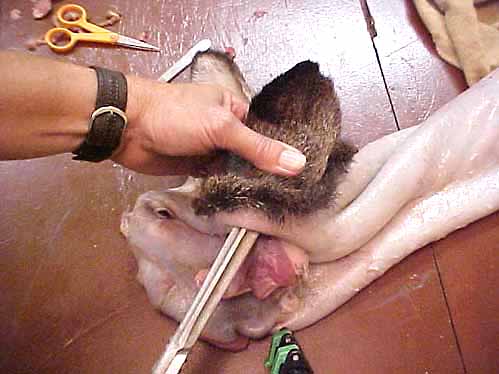
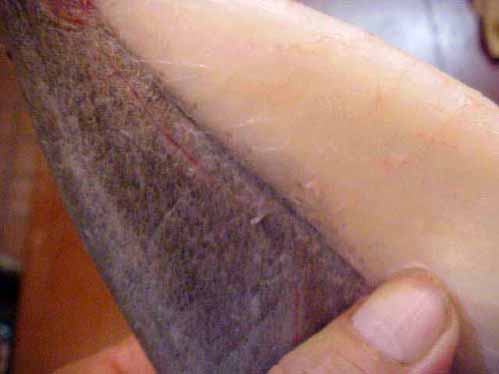
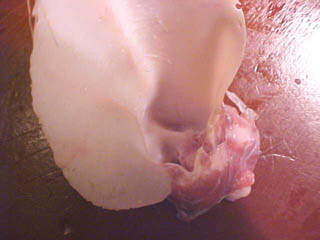
Once you are out close to the edge of the ear, be careful to avoid tearing a hole in the edge of the ear. Use fingers and thumbs to tease the skin and cartilage apart, with help from the scalpel blade where needed, until you get to the very edge of the ear.
This close-up shows you what the edge of the ear looks like when you have made a successful turn. If you do not go all the way to the edges, expect a wavy, or crinkled ear with your finished mount.
Now I did start opening the very back of the ears with ear pliers, but only until I got to the cartilage. After that, I just worked the skin off with my fingers, keeping a little pool of STOP-ROT running ahead of my fingers. I used scalpels and scissors to snip the tendons as I came to them.
Once I had the ears inverted, I came AROUND the edges to remove the inner ear skin.
I kept running the pool of STOP-ROT in front of my finger tips, working skin loose as I went. Now I did wind up getting a tear down inside the ear canal, below the V, or conch with this ear (no big deal, this is excess that gets trimmed off). I was to the point I didn't have enough room for my finger, and tried to twist and pull it out. On the other ear, I used a blunt sculpting tool when I got to the tight place, and took the skin off with out tearing it.
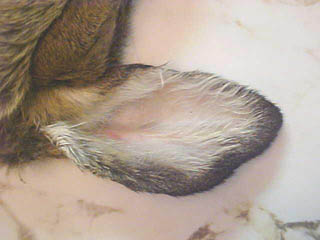
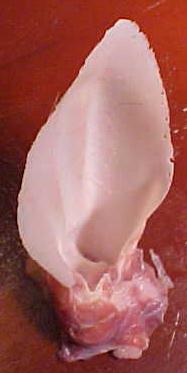
When the ear is fully opened to the edges all the way around it will look like this. The cartilage will be fully removed for ear liners, or for the Bondo technique, the remaining pieces of meat will be cleaned off.
From above:
Conditions that can cause you problems are age of the deer (ears on old bucks can be pretty tough), fly and tick bites, freezer burn, air dried ears, and physical damage such as rips, tears, and holes.
Something that all the above will have in common is that they all have some form of "dryness" that causes a glue-like bonding of skin to cartilage. What you want to do is to restore the skin and cartilage to an ELASTIC condition, quite similar as to what the animal had when it was "fresh" dead.
However, you might still expect hair loss at the site of the fly and tick bites, those areas more than likely had secondary infections while the animal was alive, and the damage is already done.
What I am about to show you was done as a preventive to keep the cape from drying out and freezer burning, BUT it is quite possible and probable to reverse the dried out and freezer burn conditions.
There's probably a number of people reading this that have capes that have been frozen for a year or two, or three, and question if they are still good.. If you were to take that cape, thaw it out, apply STOP-ROT as described below, and then put it BACK IN THE FREEZER for at least three weeks, you will probably get a fairly respectable restoration of the skin.
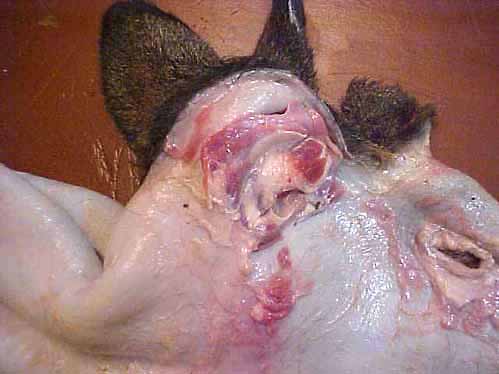
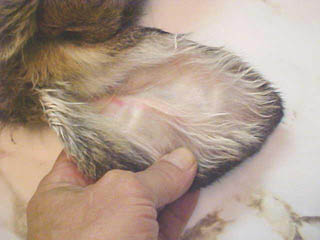
This particular head was skinned out the day after the deer was shot. The cape was then treated with STOP-ROT on the flesh side, AND the ears, nose, eyes, and lips were soaked on the hair side. The cape was then rolled up in a ball, hair side out, with all the face and ears being in the center of the ball. It was then left in the freezer for 20 months.
You can see in the photos of the inside of the ears that they have a fresh, almost alive look. Note the suppleness of the ear on your right.
More detail fleshing information.
WHITETAIL DESIGNER SYSTEMS, INC.
Has made another expansion! WEB SITE SERVICES for taxidermists are now available!
WHITETAIL DESIGNER SYSTEMS offers our multi-step tanning system in kit form for the beginner or hobbyist that needs smaller quantities.
Kits are available through WHITETAIL DESIGNER SYSTEMS only and can be charged by phone. Toll free 1-877-861-5679.
HOBBY KIT
Contains 1 pint TAXIDERMIST'S LEATHERIZING ACID, 1 pint FAT·B·GONE, SHRINK-TONIC,1 pint CAM-L-C, pH papers and Instruction Guide. Enough for 3 average size whitetail capes or several small mammals!
$29.95 plus UPS shipping
DELUXE HOBBY KIT
Contains 1 pint STOP-ROT, 1 pint TAXIDERMIST'S LEATHERIZING ACID, 1 pint FAT·B·GONE, SHRINK-TONIC,1 pint CAM-L-C, pH papers and Instruction Guide. Enough for 3 average size whitetail capes or several small mammals!
$39.95 plus UPS shipping